


Garden Tower Project: Garden Tower 2 Setup & Review
This post contains affiliate links. The Frazzled may earn a commission if you purchase any items through these links at no cost to you.
I finally received The Garden Tower Project’s Garden Tower 2 this past week and had the opportunity to set it up. Here are my first impressions.
Setup
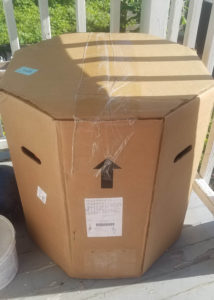
The tower arrived disassembled in an octagonal box with a set of instructions. The setup was easy and intuitive – it was actually simple enough to figure out without reading the directions. (But as anyone with IKEA furniture knows, that’s not always the best strategy – so I read the directions.)
The tower is made of BPA- and PVE-free food-grade plastic, which can be recycled later when necessary, and is UV-resistant for durability. In the center is a composting tube that allows you to discard brown and green scraps to further feed your plants, as well as a nutrient water and mulch collection drawer on the bottom. The drawer is separated from a compost tube by a plastic screen so the nutrient water (the excess water that drips from watering through the compost) is separated from the resulting mulch.
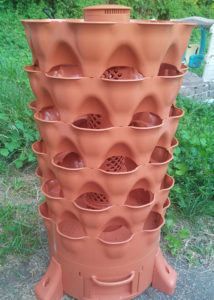
The tower snapped together easily. However, the separate cylindrical pieces that form the compost tube did give me some trouble, since there’s only one way they can be snapped in. I feel these molded pieces could have been better designed to fit together – some of them semi-collapsed into each other, requiring me to take the tube apart and refit it. You are provided with zip ties to steady the tube before pouring in the soil, but that also caused some headaches, because I tightened the first zip tie a little too much, which made the tube crooked. I just cut it and was able to adjust it correctly with the remaining five zip ties. (This probably could have been avoided all together with better tube design.) The compost tube is fitted with a cap that can only be put on one way.
It was easily a one-person job and could be completed in three to five minutes. An older child could set this up with adult help.
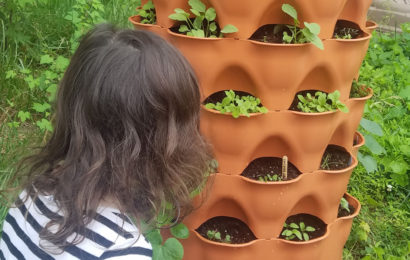
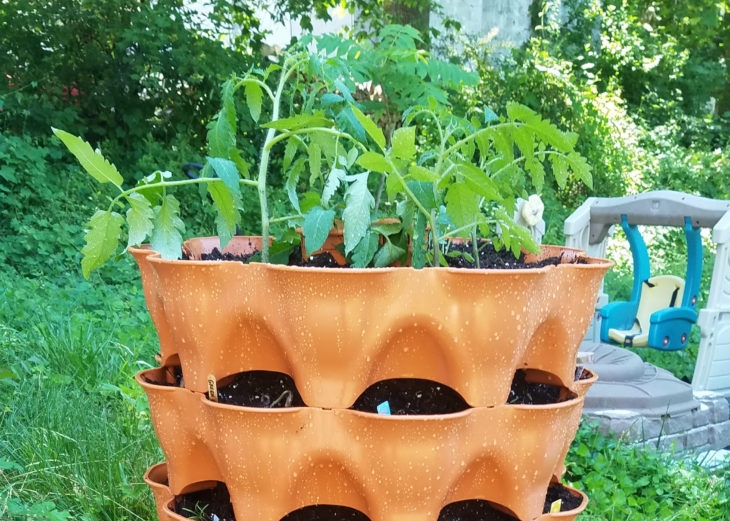
The resulting tower, sans soil, was sturdy and rotated easily. It stands 43″ high, just at my chest level. It only takes up a footprint of four square feet.
Filling with Soil
Filling with soil was a little more difficult than the setup, because I was using more cost-efficient, 50-quart bags of Miracle-Gro. I purchased four bags (approximately eight cubic feet, as recommended by the FAQ page) ahead of time, but it turned out I only needed five cubic feet to fill the tower. In the directions that were provided with the tower itself, it only says six cubic feet, so I over-purchased. That annoyed me a bit, because the bags were pricey at $14 a pop and I would have to deal with a returns process in a COVID-19, socially distant manner. Luckily, my neighbor bought the extra bag from me and saved me some hassle.
It was awkward lift those size bags to pour in the soil from the top, and I lost a little in trying to do so. You’re supposed to fill in a little, water, fill in some more, water, then top off the soil to an inch of the top. I tried shoveling and using a bucket, but it just took way too much time. Overall, the process would have been less messy and easier to pour had I 25-quart bags.
The soil didn’t fill in the little side containers fully, so after filling the tower from the top, I added additional soil to the side containers by hand to make sure they were filled all the way.
The tower weighs approximately 220 lbs. with the soil added.
Planting
Planting was very simple, and The Garden Tower Project provides you with a guide on which plants do better and which plants to avoid, as well as where the seedlings should be planted or seeds sown based on water needs, root growth, and overall plant happiness.
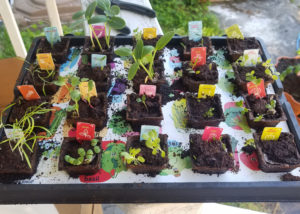
Most of the seeds I planted in Stop & Shop’s Grow & Learn kit sprouted, with the exception of the bell peppers, so all of them were transplanted to the garden tower. I also had extra seeds I started and seedlings from friends’ gardens. Here’s what I planted:
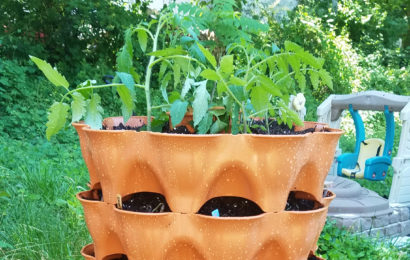
- Top open area: Green Zebra tomatoes, Black Krim tomatoes, a surprise volunteer tomato, and gherkins
- Row 1: Snap peas, green beans, carrots, cherry tomatoes
- Row 2: Beets, turnips, radishes, broccoli, mustard greens,
- Row 3: Parsley, thyme, collard greens, garlic chives, oregano, basil, dill
- Row 4: Mustard greens, iceberg lettuce, leaf lettuce, leeks, kale, celery, fennel
- Row 5: Butternut squash, acorn squash, cucumbers, eggplant
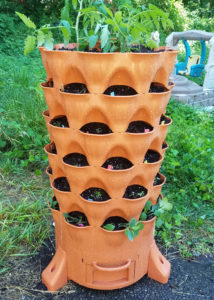
All the plants survived the transplant process and seem to be thriving in their new home.
Watering
The plants suck up water fast, so I’ve found myself watering twice a day (the directions provide a handy guide). I’m awaiting delivery of the Bloem 2.6-Gallon Easy Pour Watering Can because I’m afraid I’m going to damage the seedlings or mess up the dirt with the shower setting on my hose. There hasn’t been much nutrient water collection in the drawer, so the plants are getting optimal water.
Each morning, I rotate the tower one third so the plants get different sun exposure each day.
Composting
I love the idea of the compost tube. The problem is the location where you deposit your brown and green scraps at the top of the tower. The top of the tube is near the soil, so it’s hard to open without the top plants getting in the way or leaves caught in the cover. Once the tomato plants are fully grown, I have a feeling it will be difficult to open and close, especially since the cap can only be replaced in one configuration. To make it easier to compost, I would love the tube to be taller for easier access and the cap able to fit in any orientation.
I ordered red composting worms and European night crawlers from Uncle Jim’s Worm Farm to increase the efficiency of the composting, and I will hopefully get them in the next two days, since they’re only shipping from Pennsylvania. These are something I could have purchased locally from bait shops or pet stores, but I’ve already hit my COVID-19 store visit quota for the week.
Overall Pros & Cons
Pros
- Easy to set up
- Doesn’t take up a lot of space
- Attractive design and functionality
- Ability to compost right within the tower
- Can house many different types of plants
- The ability to rotate
Cons
- Expensive (not sure I would have purchased at full price yet; I’d like to see how it performs before expanding). Cheaper towers are available on Amazon, but do not have the design features of the Garden Tower 2.
- Compost tube could be better designed to avoid crookedness and easy of adding compost
- Filling with soil was more difficult than anticipated
- Conflicting instructions on website and sheet provided
Follow my Garden Tower Project page for weekly(ish) updates as my vegetables grow and I get full use of the tower!
One thought on “Garden Tower Project: Garden Tower 2 Setup & Review”